Creating and Editing Channels
A channel is a connection to the agent you want to test. Every test runs against a channel, and the channel’s connection type (its adapter) decides which fields you fill in. This guide walks through creating and editing a channel for each adapter.
Open the create form from a Project’s + Channel button (or New Channel in the channel list). Editing an existing channel opens the same form pre-filled.
Pick an adapter
Section titled “Pick an adapter”The first choice is the Adapter — it sets everything else on the form:
| Adapter | What it tests |
|---|---|
| Inbound Call | A live phone call where Testzilla dials in to your agent, via Retell or VAPI telephony |
| Outbound Call | Your agent places the call to a dedicated Testzilla number; the transcript is scored after the call (coming soon) |
| LLM Chat | The Retell chat agent directly, over text |
| Web Chat | A chat widget on a live website, driven by a browser |
| Web Voice | A browser WebRTC voice call with a spoken tester |
| Health Check | Not a conversation test — verifies that the configured phone numbers are reachable |
| Folder | Not an agent — a container that holds a reusable test suite (see Test Suites) |
The form only shows the fields that adapter needs.
Phone channels
Section titled “Phone channels”Phone channels default to Retell. Pick your integration, then enter your agent’s inbound phone number — the number Testzilla will dial in to. Direction is named from your agent’s perspective: inbound (Testzilla dials your agent) is available today; outbound (your agent places the call to Testzilla) is coming soon.
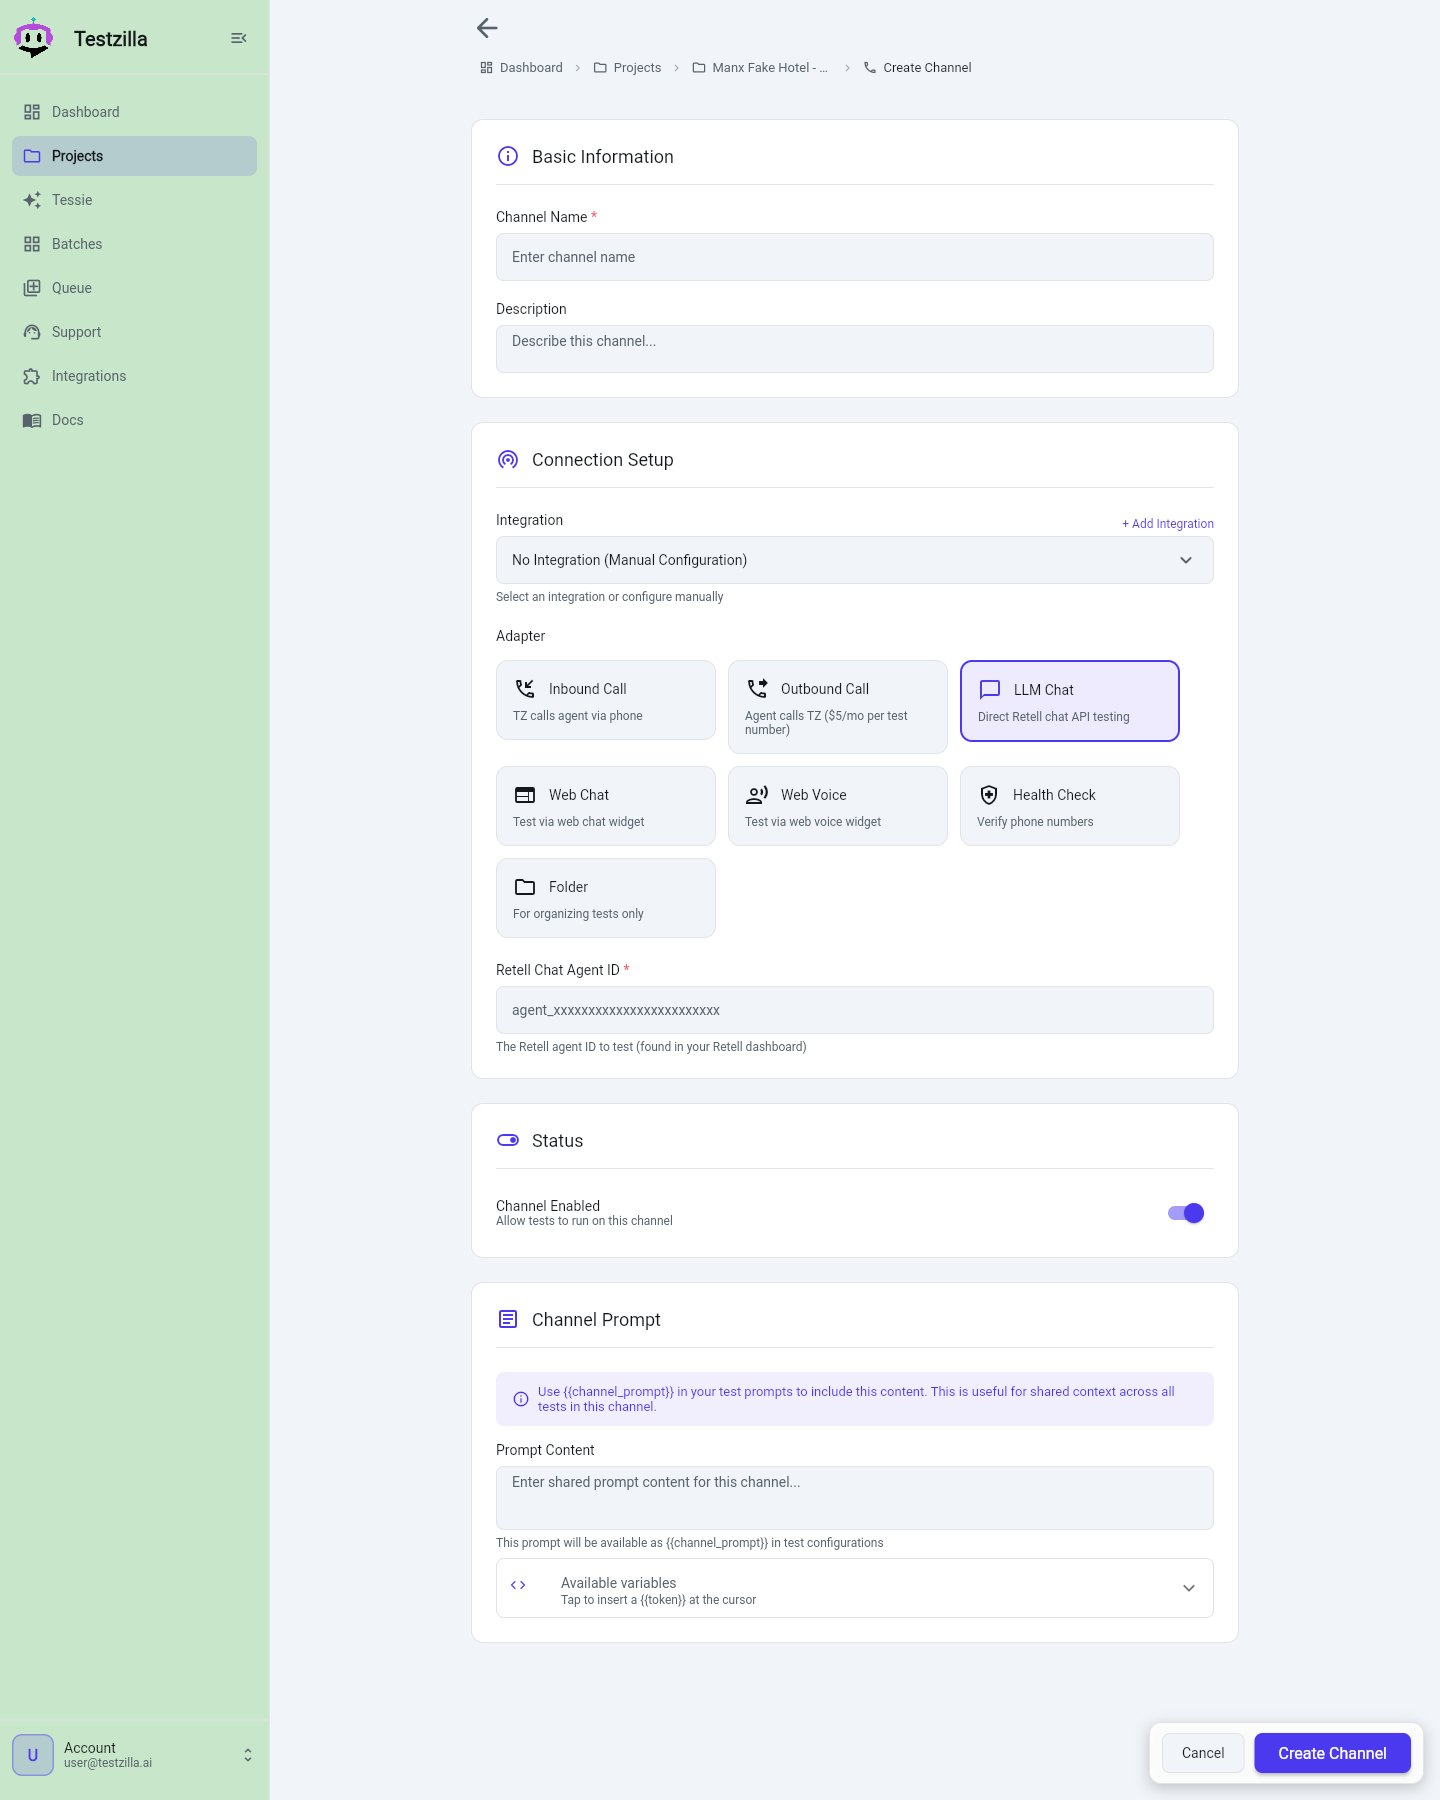
LLM Chat channels
Section titled “LLM Chat channels”LLM Chat talks to your Retell chat agent directly over text — no browser, no phone.
What you fill in:
- Retell Chat Agent ID — the agent to test. It must have chat enabled in the Retell dashboard.
The platform is forced to Retell for this adapter.
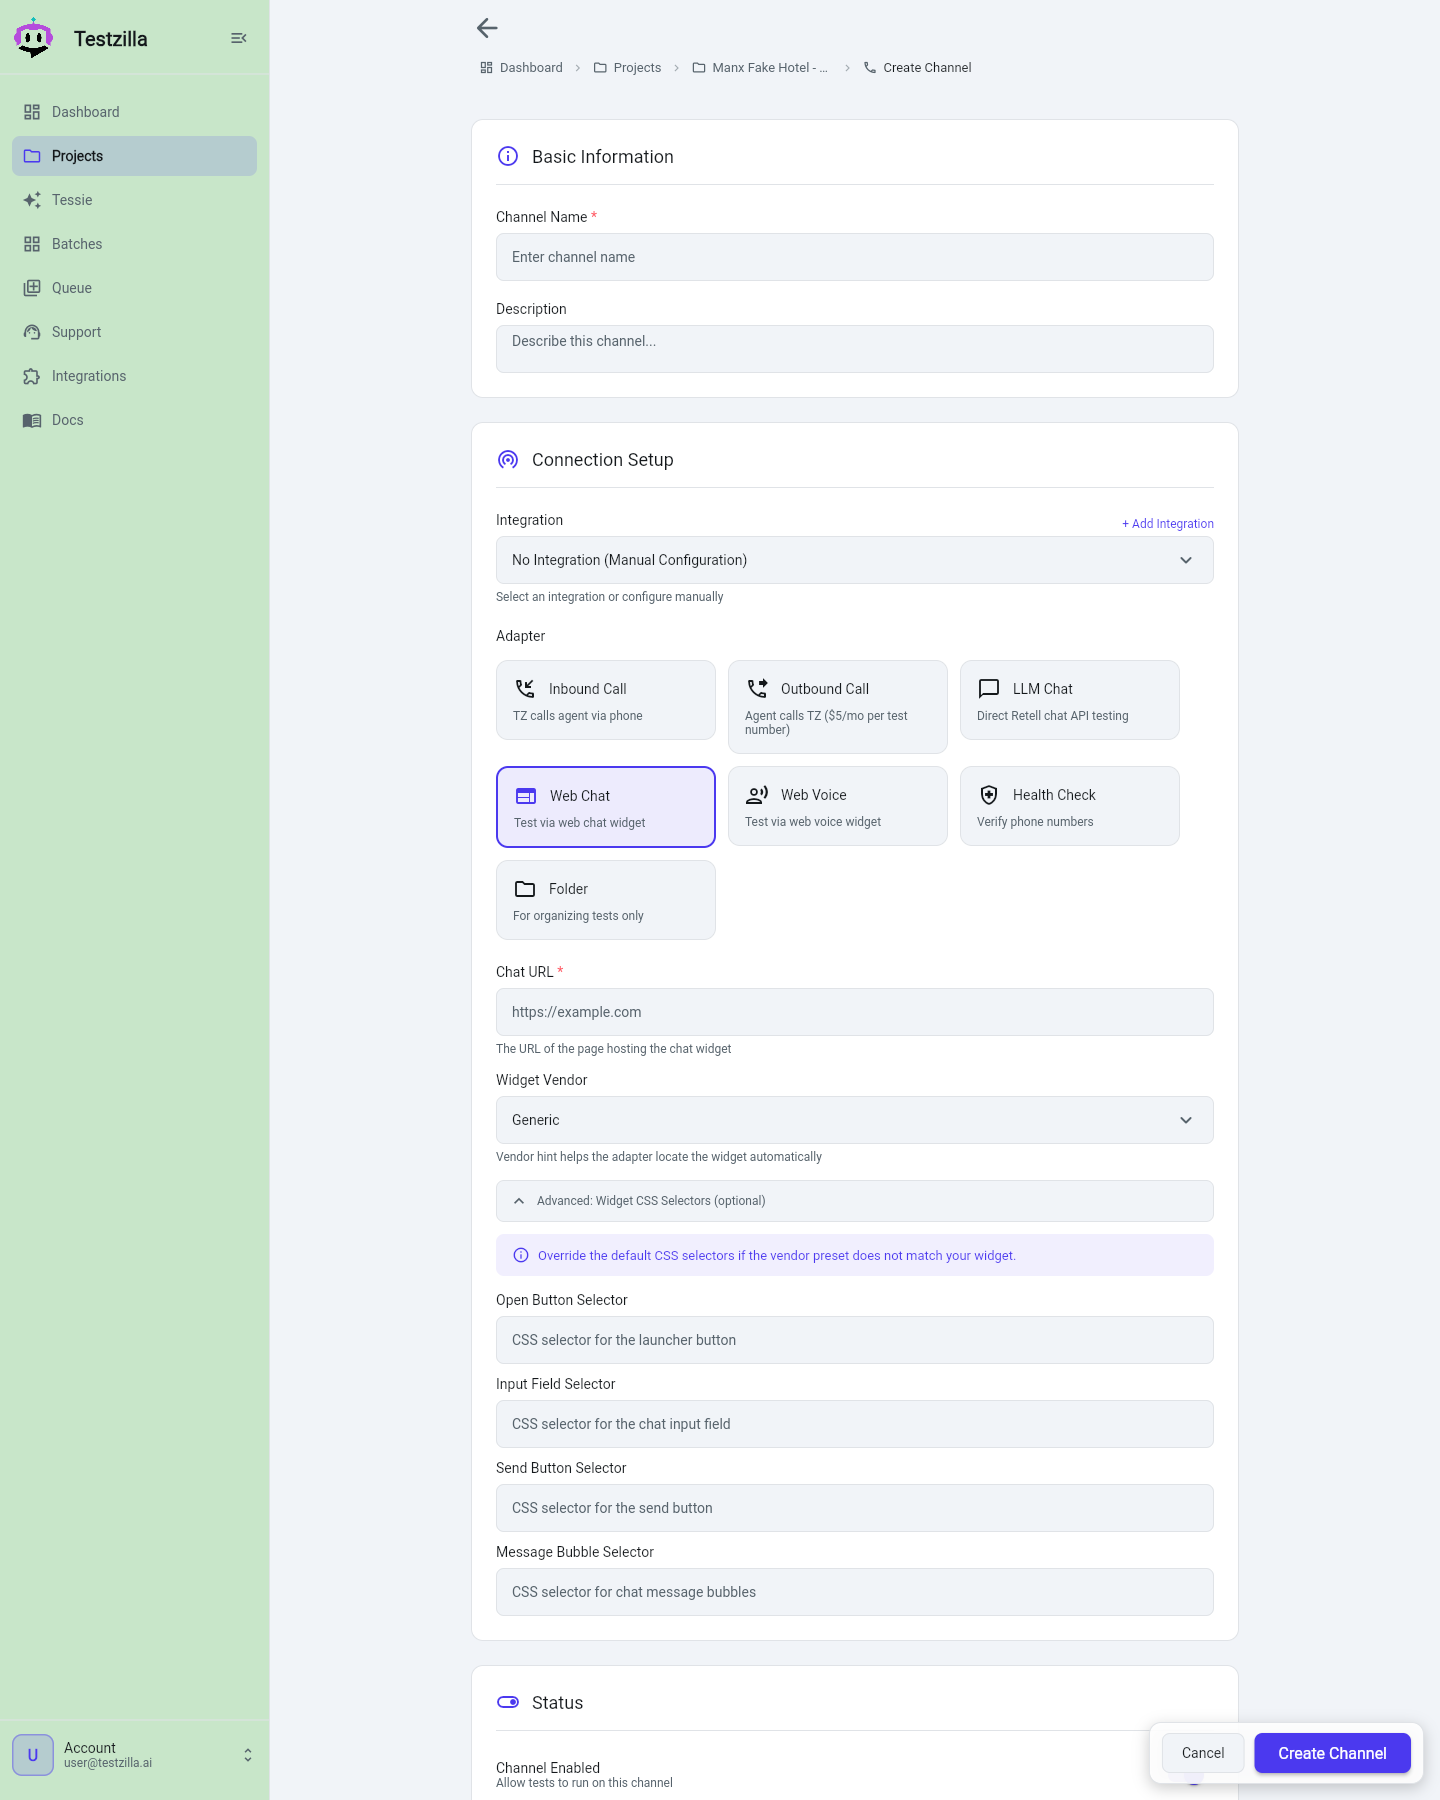
Web Chat channels
Section titled “Web Chat channels”Web Chat drives a real chat widget on a live page using a browser harness. It detects the widget, opens it, and talks to it through the DOM exactly as a visitor would.
What you fill in:
- Chat URL (required) — the page hosting the chat widget, e.g.
https://example.com. - Widget Vendor — a hint to help locate the widget automatically. Choose
Genericto let Testzilla auto-detect, or pick a known vendor: Retell, Intercom, Drift, Crisp, Zendesk, Tidio, or LiveChat. - Advanced: Widget CSS Selectors (optional, collapsible) — if your widget is unusual, supply CSS selectors for the open button, the input field, the send button, and the message container. Leave these blank to rely on vendor detection.
The platform is forced to Retell for this adapter.
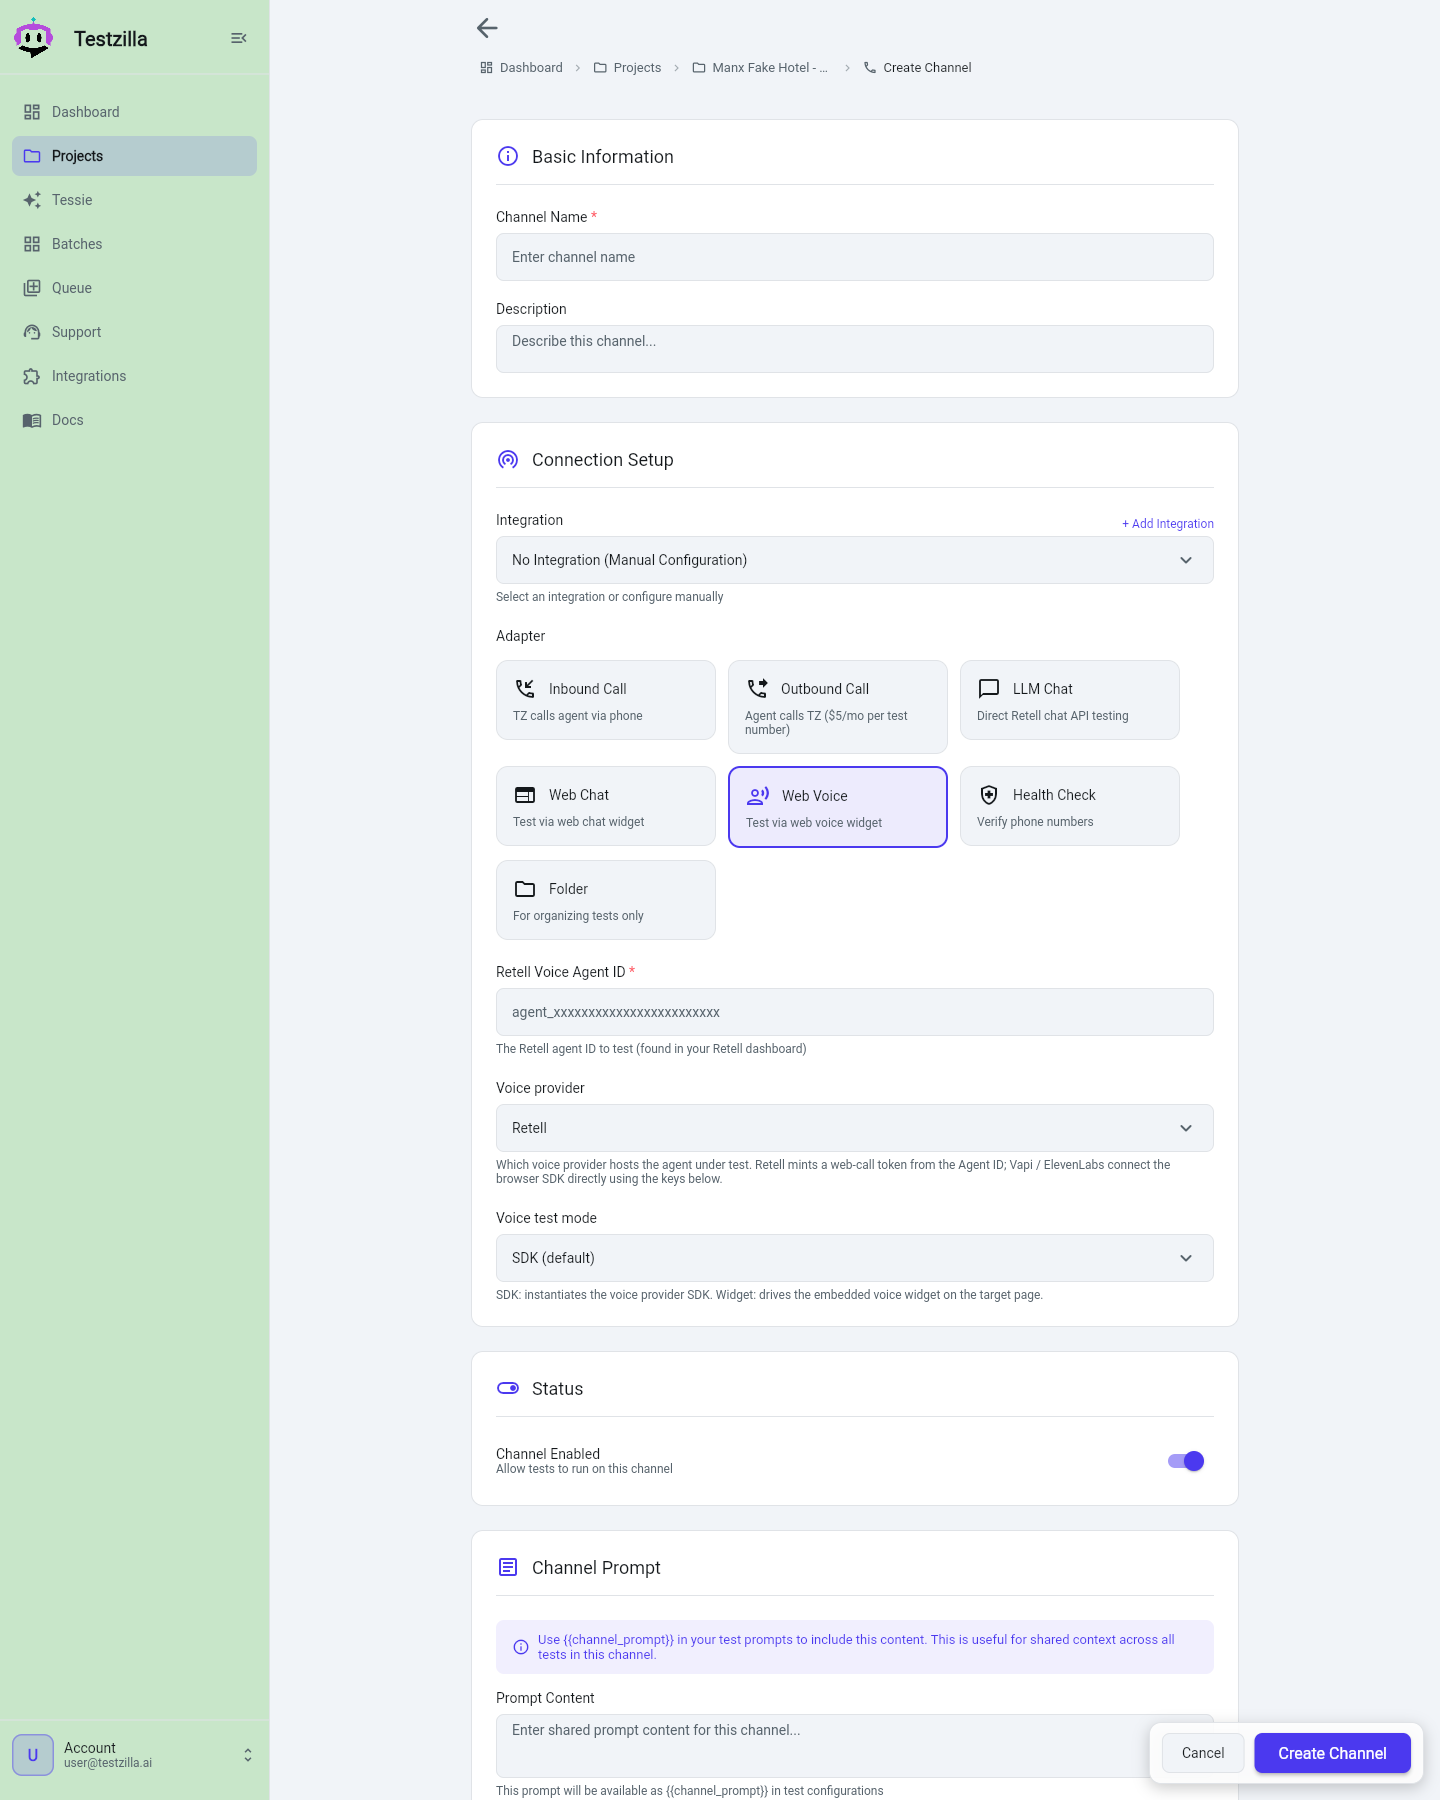
Web Voice channels
Section titled “Web Voice channels”Web Voice runs a browser WebRTC voice call with a spoken tester — the same path a visitor takes when they click a voice button on your site.
What you fill in:
- Voice Agent ID — the agent used to create the web-call session.
- Voice provider — which provider hosts the agent under test. Retell mints a web-call token from the agent ID; Vapi and ElevenLabs connect the browser SDK directly using the keys you supply.
- Voice test mode — SDK (default) instantiates the voice provider’s SDK directly, or Widget drives the embedded voice widget on the target page.
Agent System Prompt
Section titled “Agent System Prompt”A channel can carry the system prompt of the agent you are testing — the agent under test’s own prompt, as you wrote it. This is optional, and it is your IP: Testzilla stores it privately, never edits it automatically, and never includes it in shared output.
- When the agent is connected through an Integration, its system prompt is shown read-only on the channel, pulled straight from the source.
- In manual mode, an Agent System Prompt field lets you paste the prompt yourself.
Providing it powers two AI features:
- A better test suite. Tessie reads the agent’s prompt as context when it generates tests, so the suite covers what the agent actually claims to do.
- Agent Prompt Improvements in the Report. After a run, the channel Report compares the prompt against the real transcripts and suggests concrete improvements — always as suggestions, never auto-applied.
Prompt variables
Section titled “Prompt variables”Project, channel, and test prompts can include {{token}} placeholders that are filled in at run time. A helper next to each prompt field lists the available tokens — tap one to insert it at the cursor.
| Token | Expands to |
|---|---|
{{project_prompt}} | The project’s default prompt content |
{{channel_prompt}} | The channel’s shared prompt content |
{{timestamp}} | Current Unix timestamp in seconds (e.g. 1749168000) |
{{iso_date}} | Current UTC datetime, ISO 8601 (e.g. 2026-06-06T14:20:00.000Z) |
{{date}} | Current UTC date, readable (e.g. Saturday, June 6, 2026) |
{{time}} | Current UTC time, readable (e.g. 14:20 UTC) |
{{phone_number}} | The SUT / channel phone number (blank for chat channels) |
The four time tokens are computed fresh every run (UTC), so a test that asks the agent for “today’s date” always sends the real current date.
Prompts are layered: project -> channel -> test
Section titled “Prompts are layered: project -> channel -> test”{{project_prompt}} and {{channel_prompt}} let you share prompt content downward instead of copying it. They resolve in three layers, from the bottom up:
- Project — expanded first (time and phone tokens only). It cannot reference the channel or itself.
- Channel — may embed
{{project_prompt}}, which is inserted already fully expanded. - Test — may embed both
{{channel_prompt}}and{{project_prompt}}, each inserted fully expanded.
So a test that contains {{channel_prompt}} gets the channel’s prompt with the project’s prompt already nested inside it. Keep shared instructions on the project or channel and reference them from each test, rather than duplicating.
Save and run
Section titled “Save and run”After saving, the channel appears in its project. Add tests and run them against the channel. Web Chat runs produce a rich result with screenshots, and you can generate a Report for the channel at any time.